

Who hates to throw away a shoebox? Especially those nice sturdy boxes with hinged lids...aren't those just the coolest things? I have been collecting photos for years, and learned many years ago that shoeboxes make excellent storage for photos. No need to go looking for acid free boxes. Shoeboxes fit the bill. And they are just garbage once you wear the shoes. (Because I never put shoes back in the original box after the shoes are on my feet.) So there I am, all these boxes, and I start throwing photos in them, for safekeeping, with the intention someday of organizing said photos. (Personally, I think it is way more fun to pull photos out of a shoebox and pass them around when someone's visiting, than have them pasted into a fancy schmancy photo book. Now all of you with fancy photo books, please don't crucify me. It is just my opinion, after all.)
 |
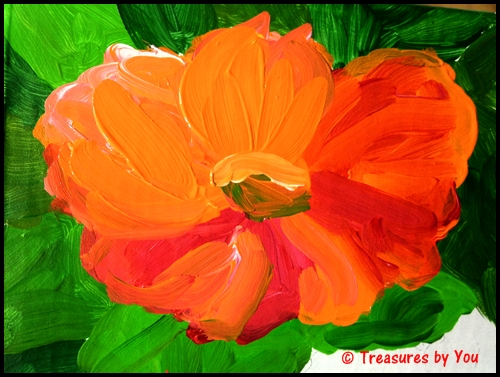
| I used this for my design idea |
 |
| greens, orange |
 |
| reds, yellow, and white |
After mulling the idea through my head for several weeks, I got started. Here are the supplies you need:1 shoeboxGesso + large flat brushAcrylic paints: warm red, cool red, warm blue, bright orange, bright green, medium yellow, and whitePaintbrushes: size 5 and 8 round, and size 4 detail brushPaper plate (I use a plastic pallette that paint will peel off of when it dries)Water
Rags
 |
| gessoed shoebox |
 |
| lightly sketch the outline of the flower |
Step 2: I painted the bottom first. The main reason I did was because if I goofed it up, it wouldn't be as noticeable. (I've had some epic fails in projects over the years. It's always nice when you can hide a failure.)

 |
| paint greens in background first |
 |
| add the flowers and blend colors |
 |
| red and orange petal |
 |
| layer a pink petal on top |
 |
| layer more petals, and blend |


 I was happy with the way the bottom turned out, so I went on to paint the rest of the box. I let it dry before I painted the lid edges. (If the top had been separate, this would not have been a concern. But I didn't want the paint rubbing off the top edge of the box bottom because the lid was rubbing it.)


I think I will make more of these boxes, and might even be giving some as gifts. They make a great place to store photos, or anything at all really. It's a way of making a nice looking storage box, with my "style" stamped on it. I have more ideas for these little boxes just jumping around in my head.
What do you think? Give this a try and let me know how your "treasure" turns out!
~cath
follow us on Twitter @TreasuresBy_You
Treasures by You
Let's Paint!
Really cute and cool idea!..now if only I could paint like you ;-)
ReplyDeletethis was easy peasy, I promise Joy... :D
DeleteI just love them, will go buy more shoes so I have some boxes, :-D
ReplyDeleteYes it's a good excuse to buy more shoes :D
DeleteI was thinking exactly what Joy was thinking and wrote. I did a few scrapbooks and have also come to the conclusion that I enjoy pulling photos out of a box and passing them around the table!!! Thanks for the great idea and excellent instructions.
ReplyDeleteGlad you enjoyed it Alicia, but you can really decorate the box anyway you want to...hear that Joy? You can use stickers and glue, glitter and fabric...I am just a paint junkie. :D
DeleteI'm also a box stacker, and I'd rather stack boxes of photos, than try to keep up with a gozillion scrapbooks.
Pretty. I do the same thing, but I actually use them to store shoes in; painted with a picture of the shoes that are inside.
ReplyDeleteWow Lucy, now that's a thought! I have a rack that my shoes sit on, and so the boxes were thrown away. I started throwing photos in them when I ran out of photo books, and then I started realizing if they were decorated, they wouldn't have to be shoved in a closet, but could sit out. I like your idea though, and for those who are super organized in their closets, it would be a perfect choice for shoe storage!
DeleteWow this is great! I didn't know you paint as well. I love what you have done with the box.. creative
ReplyDeleteYes Hind I have been painting since I was twelve. When I see a blank surface, I want to cover it in paint! :D I saw that you and I shared a love of painting the first time I visited your blog. Thanks for commenting.
Delete