Showing posts with label acrylic paint. Show all posts

Saturday, November 24, 2012

hats off to you!

This is the time of year when we tend to do more things indoors because of winter temperatures and weather. I decided to work on something for summer, to bolster my mood and to get a jump start on creating some things that could be enjoyed when the weather is nicer and we head outdoors to sun and fun again.

I was inspired by a book I had downloaded called The Sketchbook Challenge by Sue Bleiweiss that got my creative juices flowing, and decided I was going to paint a hat.

I have a cotton sunhat, and it has two sides. One side is turquoise, my favorite color, and the other is white. We all know that white is a great color for summer, but it is also the hardest color to keep clean, especially on a hat. So I decided I would decorate the white side, and also create something that would show a little less soil.

Materials I used:
acrylic paint in bright colors
Pitt Pens in black ink size S and F
round brushes in size 4 and 6
liner brush in size 1

I started out by just freehand sketching some simple flowers on the hat, because I know me.  If I didn't sketch them in first it would end up looking like someone had vomited flowers all over the hat, and I wanted to have a bit of control.


After sketching the flowers in, I started painting in the flowers, using one of the round paintbrushes.  I kept adding flowers to it until I had them painted in.  Then I took the green Sharpie paint pen and added vines.
After that I added the leaves in with a small round brush.


After all the painting was completed, I took the Pitt Pen in size F and outlined the flowers and the vines and leaves.


That was all there was to it.  It was a lot of fun to paint, and easy to do.  Even though the paint and pens are waterproof, I don't think I am going to test it by washing the hat.  I figure it can be worn until it looks ratty, then it is time to buy a new $5 hat and start painting again!


Have fun and remember every day is a good day when you paint!

 we Tweet @TreasuresBy_You

Saturday, June 16, 2012

a shoebox by any other name...

Wow, it's been a while since I posted.  Sometimes life is a whirlwind though, and you have to deal with the whirlwind don't you?  Life is more manageable now, and I decided it's time to get this show on the road.  And since I have painted on just about everything, I decided to do some recycling today.  And turn trash into a treasure.

Who hates to throw away a shoebox?  Especially those nice sturdy boxes with hinged lids...aren't those just the coolest things?  I have been collecting photos for years, and learned many years ago that shoeboxes make excellent storage for photos.  No need to go looking for acid free boxes.  Shoeboxes fit the bill.  And they are just garbage once you wear the shoes.  (Because I never put shoes back in the original box after the shoes are on my feet.)  So there I am, all these boxes, and I start throwing photos in them, for safekeeping, with the intention someday of organizing said photos.  (Personally, I think it is way more fun to pull photos out of a shoebox and pass them around when someone's visiting, than have them pasted into a fancy schmancy photo book.  Now all of you with fancy photo books, please don't crucify me.  It is just my opinion, after all.)

I used this for my design idea
greens, orange
reds, yellow, and white

After mulling the idea through my head for several weeks, I got started.  Here are the supplies you need:1 shoeboxGesso + large flat brushAcrylic paints: warm red, cool red, warm blue, bright orange, bright green, medium yellow, and whitePaintbrushes: size 5 and 8 round, and size 4 detail brushPaper plate (I use a plastic pallette that paint will peel off of when it dries)Water
Rags
gessoed shoebox
lightly sketch the outline of the flower
Step 1: Prime the box with one or two coats of Gesso, using the big flat brush to put it on.  Let it dry between coats, and then dry overnight for good measure.  I let mine dry for days.  You can plot your design while it does.  Or use the one I used.  It's YOUR treasure after all.


Step 2:  I painted the bottom first.  The main reason I did was because if I goofed it up, it wouldn't be as noticeable.  (I've had some epic fails in projects over the years.  It's always nice when you can hide a failure.)
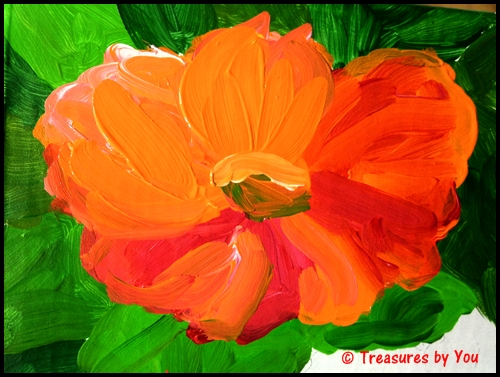
paint greens in background first
add the flowers and blend colors
red and orange petal
layer a pink petal on top
layer more petals, and blend

I kept adding petals, and blending colors until I was pleased with how they looked.


When I finished the flowers and background, I decided they needed to be outlined.  I mixed green and orange to get a dark brown. 


I kept outlining, skipping around.  I didn't want it to look like the outlines in a coloring book.  What I ended up with was sort of a bold Van Gogh type look.  It reminded me of his later paintings, bold colors and heavy outlines in broad strokes of color.

I was happy with the way the bottom turned out, so I went on to paint the rest of the box.  I let it dry before I painted the lid edges.  (If the top had been separate, this would not have been a concern.  But I didn't want the paint rubbing off the top edge of the box bottom because the lid was rubbing it.)
 After I painted it, I outlined it.  Then waited for it to dry.


 And this is how my photo box looked when I got it finished and placed the photos in it.  Pretty cute, huh?


I think I will make more of these boxes, and might even be giving some as gifts.  They make a great place to store photos, or anything at all really.  It's a way of making a nice looking storage box, with my "style" stamped on it.  I have more ideas for these little boxes just jumping around in my head.    

What do you think?  Give this a try and let me know how your "treasure" turns out!

~cath
follow us on Twitter @TreasuresBy_You


Treasures by You
Let's Paint!